Lattice Boltzmann Method based CFD Applications: M-Star and MARBLES#
The Lattice Boltzmann Method (LBM) is a novel and unique simulation method whose meshless algorithm and exact conservation combines the best parts of the immersed boundary method and the finite volume method, without the hassle of mesh generation. The method completely does away with spatial discretisation in favour of advection of particles with pre-determined discrete velocities such that they hop to lattice sites on a structured grid. The LBM has been successfully applied to a range of problems in fluid dynamics including but not limited to transitional flows, flows involving complex moving geometries, compressible flows, multiphase flows, rarefied gases, combustion, electrochemical devices etc..
Its meshfree nature makes it very convenient to handle and resolve complex geometries such as cracks and porous microstructures. The algorithmically simple nature of the LBM, which consists of a hopping of particles by a pre-determined distance followed by a local update for a time increment, makes the solver trivial to implement on a GPU, which results into very fast and scalable solvers that can be used as data generators in a machine learning pipeline.

The method computes a discrete version of the Boltzmann transport equation, which mathematically describes the state of the fluid with a Gaussian distribution in the velocity space with its mean representing the local fluid velocity and the variance representing the local energy of the fluid. The dynamics of the fluid then evolve with a streaming-relaxation equation for these probability distribution functions. The probablistic nature of the method makes it a gateway to quantum computing for CFD.
Overview#
At NLR, two packages are available for the purpose. The matrix below provides a birds eye view of the available packages. (All company, product and service names used on this page are for identification purposes only. Use of these names, trademarks and brands does not imply endorsement.)
| Windows | Mac OS | Linux (HPC) | CPU | GPU | Cost | Speciality | |
|---|---|---|---|---|---|---|---|
| M-Star | y | x | y | y | y | $ | GUI, moving geometries |
| NLR MARBLES | y | y | y | y | y | Free | Open source, compressible |
Both M-Star and Multi-Scale Adaptively Refined Boltzmann Lattice Solver (MARBLES) can utilize the parallel computing capability of the Kestrel HPC system .
Installation and Usage on Kestrel#
NLR MARBLES#
The MARBLES source code is available on Github. It can be compiled and run on NVIDIA and AMD GPUs as well as Intel, AMD and Apple M series CPUs. Here, we show the process to compile and run it on the Kestrel HPC system with NVIDIA GPUs.
Create a new directory in the projects partition
$ cd /projects/<projectname>/<username>/
$ mkdir marblesLBM
Get the amrex dependency and set the environment variable AMREX_HOME
$ cd /projects/<projectname>/<username>/marblesLBM
$ git clone https://github.com/AMReX-Codes/amrex.git
$ cd amrex
$ git checkout 25.11
$ cd ..
$ echo "export AMREX_HOME=/projects/<projectname>/<username>/marblesLBM/amrex" >> ~/.bash_profile
$ bash
Get the stable and development version of MARBLES
$ cd /projects/<projectname>/<username>/marblesLBM
$ git clone https://github.com/NatLabRockies/marbles.git
$ git clone https://github.com/nileshsawant/marblesThermal
To install the latest development version of MARBLES, the code has to be built on a GPU login node. Please do the following:
$ ssh -X <username>@kestrel-gpu.hpc.nlr.gov
$ module load PrgEnv-gnu/8.5.0
$ module load cuda/12.3
$ module load craype-x86-milan
$ cd /projects/<projectname>/<username>/marblesLBM/marblesThermal
$ cd Build
$ make
$ make USE_CUDA=TRUE
$ ls -tr
GNUmakefile  cmake.sh  tmp_build_dir  marbles3d.gnu.x86-milan.TPROF.MPI.ex  marbles3d.gnu.TPROF.MPI.CUDA.ex
Build directory should contain the MPI version marbles3d.gnu.x86-milan.TPROF.MPI.ex and the MPI + CUDA version marbles3d.gnu.TPROF.MPI.CUDA.ex of MARBLES.
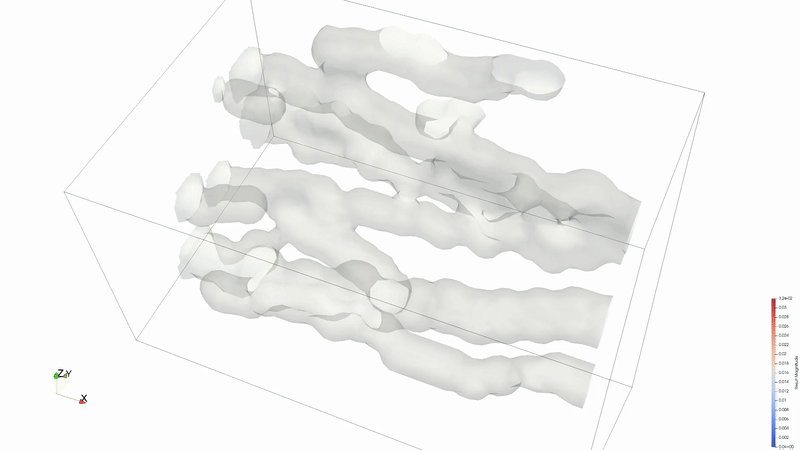
The test case for flow through fractures with heated isothermal walls can be tried out as follows:
$ salloc -A <allocation handle> -t 00:30:00 --nodes=1 --ntasks-per-node=32 --mem=80G --gres=gpu:1 --partition=debug
$ module load cuda/12.3
$ cd /projects/<projectname>/<username>/marblesLBM/marblesThermal/Build
$ cp ../Tests/test_files/isothermal_cracks/* .
# Test CPU version
$ srun -n 4 marbles3d.gnu.x86-milan.TPROF.MPI.ex isothermal_cracks.inp
# Test GPU version
$ srun -n 1 marbles3d.gnu.TPROF.MPI.CUDA.ex isothermal_cracks.inp
Results can be viewed in ParaView or VisIT.
 Animation credit: @eyoung55
MARBLES is an in-house effort to make a free Lattice Boltzmann solver available to the community. We encourage users to contact us for help setting up your problem or to request additional features. Please visit the repository and create a New issue or email us directly. A machine learning framework for using MARBLES in the loop as a data generator has also been created. Pre-built executibles, marbles3d.gnu.x86-milan.TPROF.MPI.ex and marbles3d.gnu.TPROF.MPI.CUDA.ex, can also be made available on request.
M-Star#
Warning
Please close the application when not actively using it. The license of this product allows only one user at a time.
GUI single node#
The M-Star GUI can be accessed though a FastX virtual desktop. M-Star is a resource intensive application whose backend uses Cuda aware OpenMPI to utilize multiple GPUs for computation. The application should always be run on a dedicated compute node while you can interact with the GUI through a FastX session. The steps to use M-Star are as follows:
- Open a terminal in a FastX session and ask for an allocation. For example,
$ salloc -A <projectname> -t 01:00:00 --nodes=1 --ntasks-per-node=64 --mem=160G --gres=gpu:2 --partition=debug - Wait until you obtain an allocation. The terminal will display
<username>@<nodename>when successful. - Open a new terminal tab by right clicking on empty in the terminal. In the new terminal tab, execute the following to connect to the node you have been allocated.
$ ssh -X <nodename> - You are now on a compute node with X forwarding to a FastX desktop session, ready to run GUI applications. To run M-Star, execute the following in this new terminal tab:
$ module load mstar
$ mstar
The above process will let you use utilize 64 cores, 160 GB of RAM and 2 GPUs for 1 hour, as requested in the salloc command above.
Users can try examples tutorials from the offical documentation. The Simple Agitated Tank example which is relevant to bioreactors has been tested successfully on Kestrel.
Command line multinode#
For using M-Star over multiple nodes, please set up your case with the GUI method above and then click on File > Export Solver XML File Only. The process will let you save an xml file with the default name being input.xml. This input file can be used to run the application in command line mode.
Run interactively#
Single node, multiple GPUs#
To use multiple GPUs on a single node, request a node with the required number of GPUs and pass all GPU IDs to --gpu-ids:
$ salloc -A <projectname> -t 00:30:00 --nodes=1 --ntasks-per-node=64 --mem=160G --gres=gpu:2 --partition=debug
$ module load mstar
$ mpirun --map-by ppr:2:node:PE=1 -x PATH -x LD_LIBRARY_PATH -np 2 mstar-cfd-mgpu --disable-ipc -i input.xml -o out --gpu-ids "0,1"
Run in batch mode#
Typical command line usage would involve submitting the task as a batch job. An equivalent batch script example for single-node multi-GPU is below:
#!/bin/bash
#SBATCH --account=<projectname>
#SBATCH --time=00:30:00
#SBATCH --nodes=1
#SBATCH --ntasks-per-node=64
#SBATCH --mem=160G
#SBATCH --gres=gpu:2
#SBATCH --partition=debug
#SBATCH --job-name=mstar_job
#SBATCH --output=slurm-%j.out

# Load necessary modules
module load mstar

# Run the application
mpirun --map-by ppr:2:node:PE=1 -x PATH -x LD_LIBRARY_PATH -np 2 mstar-cfd-mgpu --disable-ipc -i input.xml -o out --gpu-ids "0,1"
$ sbatch jobScipt.sh
--gpu-ids "0,1" lists the IDs of the GPUs to use — adjust the list and -np count to match the number of GPUs requested. To learn more about command line options, please refer to the M-Star documentation.
Multiple nodes#
To use multiple nodes, please follow the instructions revealed after loading the mstar/4.1.15 module. The ability to use M-Star on multiple nodes is currently limited to version 4.1.15 and on Kestrel only.
Installation and Usage on Gila#
Gila is an OpenHPC-based cluster at NLR with several GPU node types, including NVIDIA Grace Hopper (GH200), A100, and AMD MI210/MI250 nodes. MARBLES supports NVIDIA GPUs via the CUDA backend and AMD GPUs via the HIP/ROCm backend, both inherited from AMReX. M-Star runs on the A100 nodes via a dedicated module. Please check the Gila Modules page for information on the module system. For partition details and node specifications, see the Running on Gila page.
NLR MARBLES on Gila (NVIDIA Grace Hopper GH200)#
MARBLES can be compiled for the NVIDIA GH200 GPU on Gila's gh partition. Since the Grace Hopper nodes run on ARM64 (NVIDIA Grace CPU), the application must be compiled directly on a gh node. It cannot be cross-compiled from the x86-64 login nodes.
Note
git is not in the default path on gila-arm.hpc.nlr.gov. Load it first with module load git.
Clone MARBLES and initialize the bundled AMReX submodule from the gila-arm.hpc.nlr.gov login node:
$ module load git
$ cd /projects/<projectname>/<username>/
$ mkdir marblesGH && cd marblesGH
$ git clone https://github.com/nileshsawant/marblesThermal
$ cd marblesThermal
$ git submodule update --init --recursive Submodules/AMReX
From a gila-arm.hpc.nlr.gov login node, request an interactive session on a Grace Hopper node (14 cores = 1/5 of the node):
$ salloc -A <projectname> -t 01:00:00 --nodes=1 --ntasks-per-node=14 --mem=94G --gres=gpu:1 --partition=gh
Once on the compute node, load the required modules:
$ module load gcc/14.2.0
$ module load cuda/12.9.0
Warning
Do not set AMREX_HOME in your environment. MARBLES ships AMReX as a git submodule pinned to a tested commit. Setting AMREX_HOME overrides this and will likely cause compile errors. If you have it set from another workflow, unset it before building:
$ unset AMREX_HOME
Build with CUDA targeting the GH200 (Hopper, SM 9.0):
$ cd Build
$ make USE_CUDA=TRUE COMP=gnu USE_MPI=FALSE CUDA_ARCH=90
On success, the Build directory will contain the CUDA executable, e.g.:
marbles3d.gnu.TPROF.CUDA.ex
Run a test case (on the allocated compute node):
$ cp ../Tests/test_files/isothermal_cracks/* .
$ ./marbles3d.gnu.TPROF.CUDA.ex isothermal_cracks.inp
NLR MARBLES on Gila (AMD MI250)#
MARBLES can be compiled for AMD GPUs using the ROCm toolchain on Gila's gpu-amd-mi250 partition. Do not build on login nodes — request an interactive allocation on the GPU node first.
Request an interactive session on the AMD GPU node:
$ salloc -A <projectname> -t 01:00:00 --nodes=1 --ntasks-per-node=5 --mem=80G --gres=gpu:1 --partition=gpu-amd-mi250
Once on the compute node, load the required modules and set up the environment:
$ module load gcc/14.2.0
$ module load rocm/7.2.0
$ export HIPCC_COMPILE_FLAGS_APPEND="--gcc-toolchain=$(dirname $(dirname $(which g++)))"
Note
HIPCC_COMPILE_FLAGS_APPEND points hipcc to the GCC 14.2.0 toolchain loaded above. Without this, hipcc may pick up an incompatible system GCC and fail to compile device code.
Warning
Do not set AMREX_HOME in your environment. MARBLES ships AMReX as a git submodule pinned to a specific commit that is tested and compatible with ROCm 7.2.0. Setting AMREX_HOME overrides this and will likely cause compile errors. If you have it set from another workflow, unset it before building:
$ unset AMREX_HOME
Clone MARBLES and initialize the bundled AMReX submodule:
$ cd /projects/<projectname>/<username>/
$ mkdir marblesLBM && cd marblesLBM
$ git clone https://github.com/nileshsawant/marblesThermal
$ cd marblesThermal
$ git submodule update --init --recursive Submodules/AMReX
Build with HIP:
$ cd Build
$ make USE_HIP=TRUE COMP=clang USE_MPI=FALSE USE_RPATH=TRUE AMREX_AMD_ARCH=gfx90a
On success, the Build directory will contain the HIP executable, e.g.:
marbles3d.hip.TPROF.HIP.ex
Run a test case:
$ cp ../Tests/test_files/isothermal_cracks/* .
$ ./marbles3d.hip.TPROF.HIP.ex isothermal_cracks.inp
M-Star on Gila (NVIDIA A100)#
M-Star 4.1.15 is available on Gila's gpu-intel-a100-80g partition (8x A100-80GB GPUs per node, Intel Xeon Icelake CPUs). The module is installed under a separate module path that must be added before loading.
Request an interactive session on an A100 node:
$ salloc -A <projectname> -t 01:00:00 --nodes=1 --ntasks-per-node=42 --mem=800G --gres=gpu:8 --partition=gpu-intel-a100-80g
Load the M-Star module:
$ module load application
$ module load mstar/4.1.15
Note
mstar/4.1.15 automatically loads cuda/13.1.1 and hpcx/2.26 (OpenMPI). No separate module load commands are needed.
Run M-Star across all 8 GPUs on the node:
$ mpirun --map-by ppr:8:node:PE=1 -x PATH -x LD_LIBRARY_PATH -np 8 \
    mstar-cfd-mgpu -i input.xml -o out --gpu-ids "0,1,2,3,4,5,6,7"
An equivalent batch script:
#!/bin/bash
#SBATCH --account=<projectname>
#SBATCH --time=01:00:00
#SBATCH --nodes=1
#SBATCH --ntasks-per-node=42
#SBATCH --mem=800G
#SBATCH --gres=gpu:8
#SBATCH --partition=gpu-intel-a100-80g
#SBATCH --job-name=mstar_gila
#SBATCH --output=slurm-%j.out

module load application
module load mstar/4.1.15

mpirun --map-by ppr:8:node:PE=1 -x PATH -x LD_LIBRARY_PATH -np 8 \
    mstar-cfd-mgpu -i input.xml -o out --gpu-ids "0,1,2,3,4,5,6,7"
Note
Unlike Kestrel, intra-node multi-GPU runs on Gila use CUDA IPC (no --disable-ipc needed). The --disable-ipc flag is only required for multi-node Kestrel runs. For command line options, refer to the M-Star documentation.