Data Processing with geoPFA: 2D Example from Newberry Volcano, OR
geoPFA.Load a PFA configuration file (which defines criteria, components, and layers)
Read raw geospatial datasets into the working
pfadictionaryProcess and clean these datasets onto a consistent grid ready for layer combination and favorability modeling
Subsequent notebooks will build upon this by combining layers, applying weights, and producing final favorability models.
1. Imports and Setup
# --- General imports ---
from pathlib import Path
import geopandas as gpd

# --- geoPFA core classes ---
from geopfa.io.data_readers import GeospatialDataReaders
from geopfa.io.data_writers import GeospatialDataWriters
from geopfa.processing import Cleaners, Processing
from geopfa.plotters import GeospatialDataPlotters

# --- Utilities ---
from geopfa.io.data_readers import safe_json_load
from geopfa.datasets import setup_newberry_tutorial_data
Define Directories
# Get the directory where this notebook lives
notebook_dir = Path(__file__).resolve().parent if "__file__" in locals() else Path.cwd()

# Define the main project directory (where 'config/', 'data/', and 'notebooks/' live)
project_dir = notebook_dir.parent

# Define subdirectories
config_dir = project_dir / "config"
data_dir = project_dir / "data"

# Confirm structure
print("Notebook directory:", notebook_dir)
print("Config directory:", config_dir)
print("Data directory:", data_dir)

# Quick check before proceeding
for folder in [config_dir, data_dir]:
    if not folder.exists():
        raise FileNotFoundError(f"Expected folder not found: {folder}")
Notebook directory: c:UserssmellocodegeoPFAexamplesNewberry2Dnotebooks
Config directory: c:UserssmellocodegeoPFAexamplesNewberry2Dconfig
Data directory: c:UserssmellocodegeoPFAexamplesNewberry2Ddata
Download and extract example data
Here we use a built in function to download and extract the sample data for this tutorial to the necessary location
setup_newberry_tutorial_data(data_dir) # download exampel data to data directory defined above
Data extracted to: c:UserssmellocodegeoPFAexamplesNewberry2Ddata
2. Configuration and Data Input
With the project directories defined, the next step is to read the configuration file and load all raw geospatial data into memory.
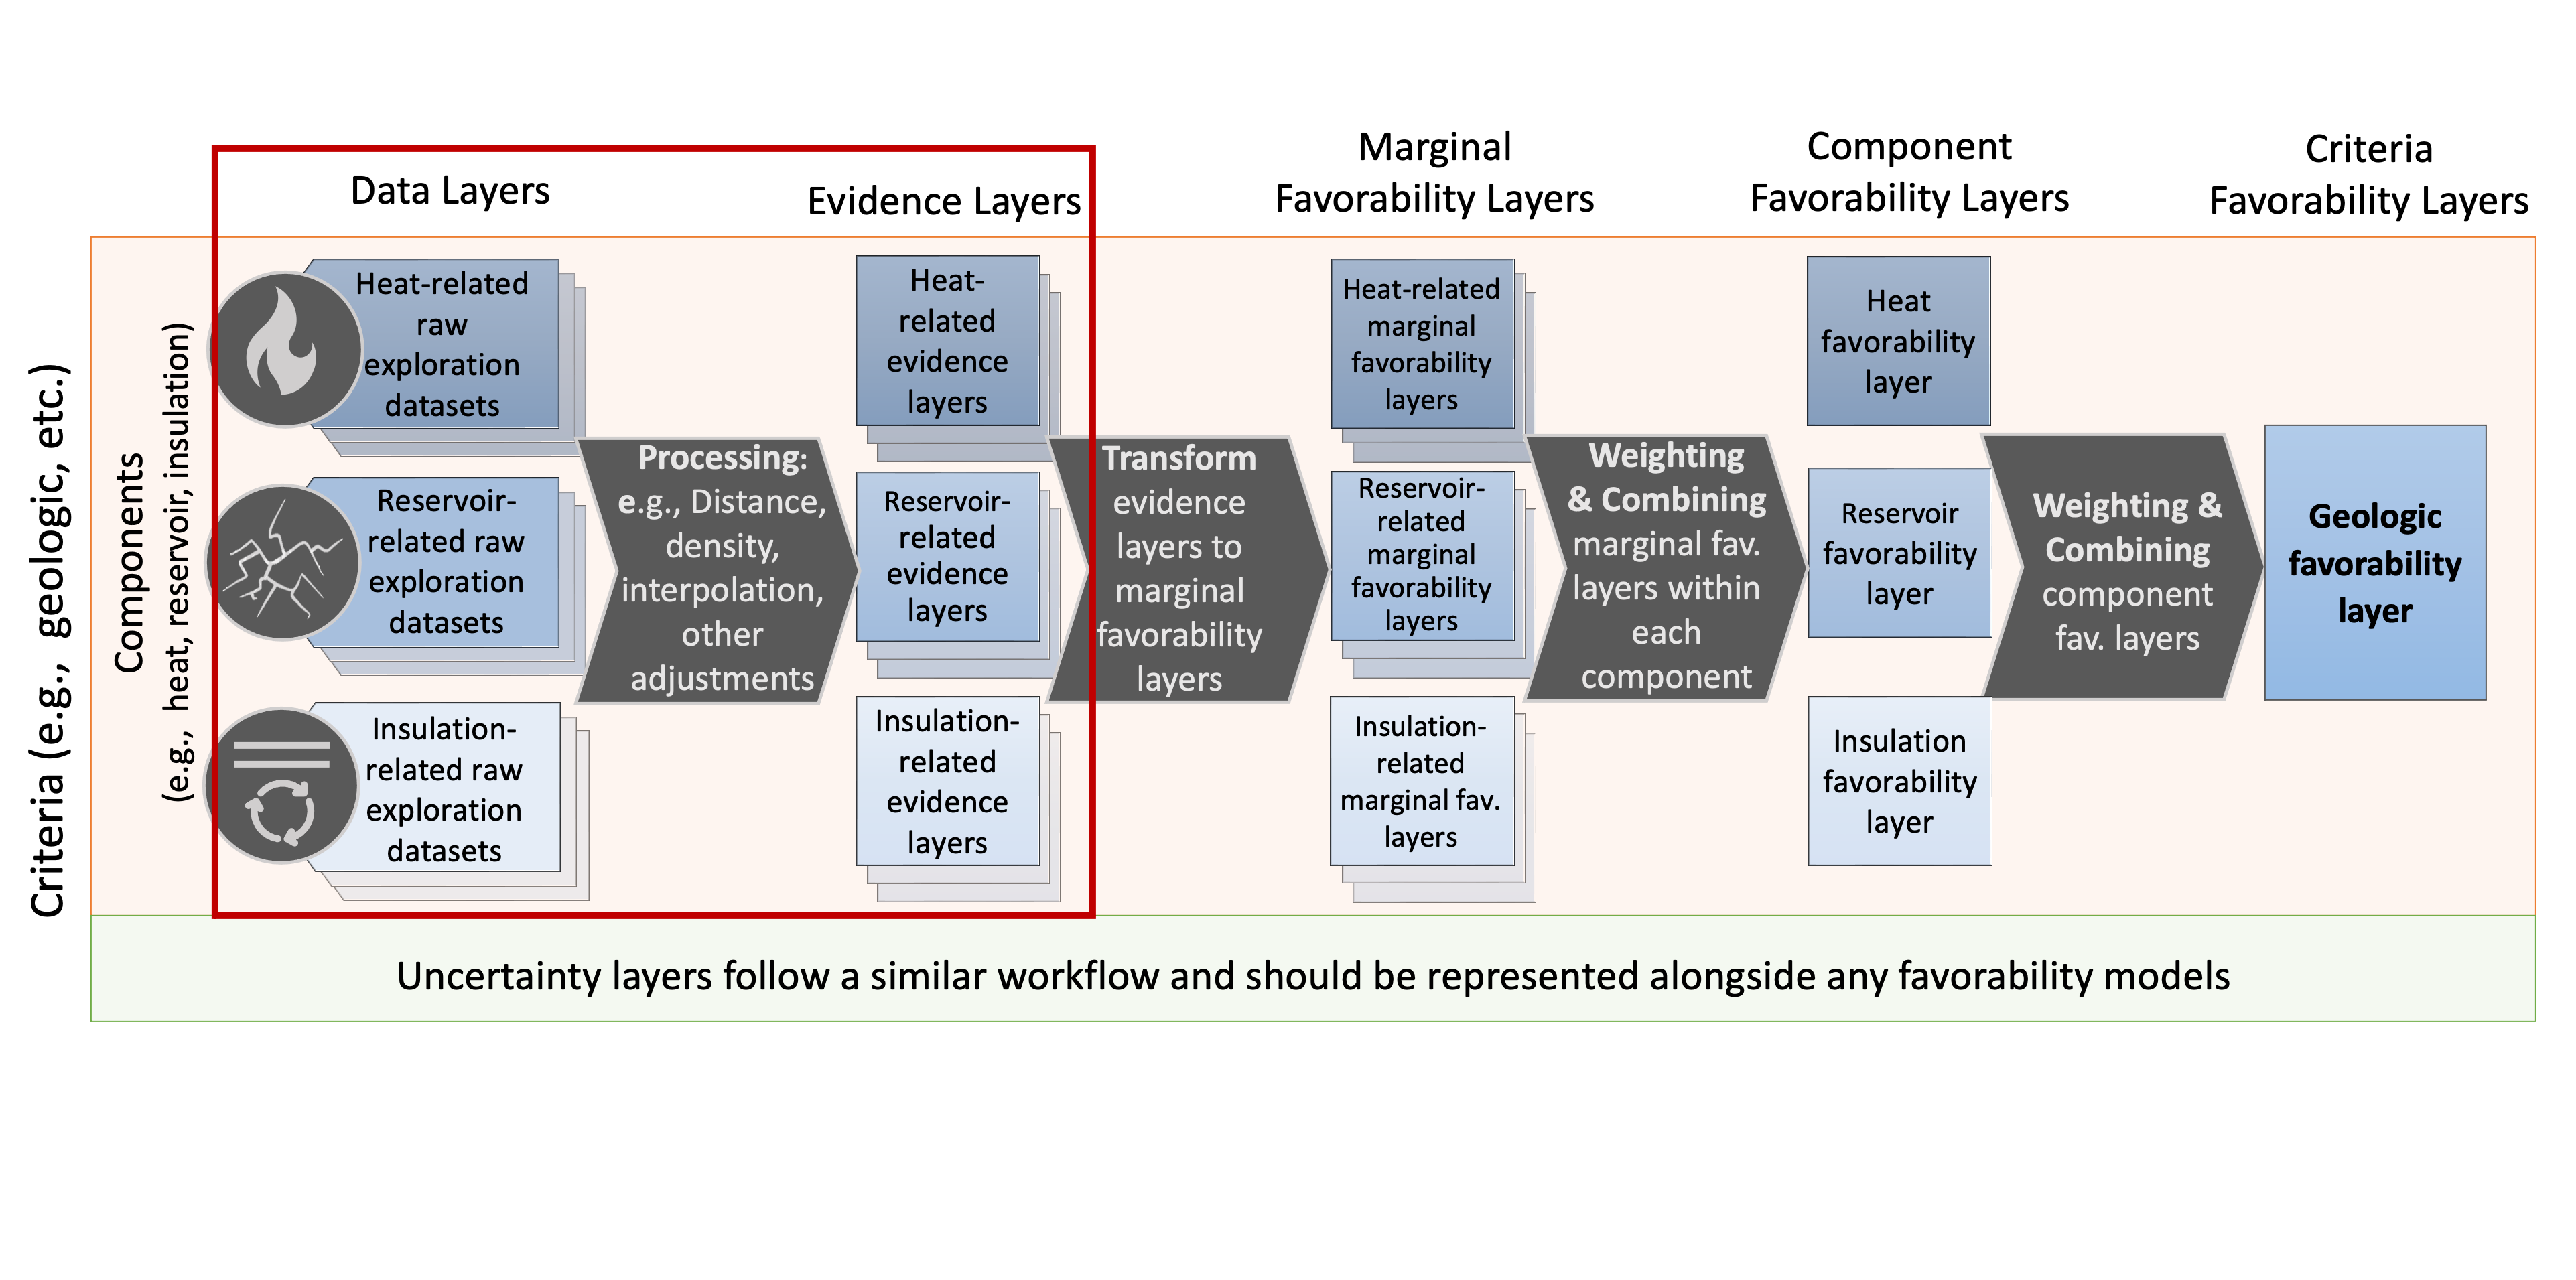
Note: In this tutorial, the previous step automatically downloaded and structured the example dataset so that the /data directory already matches the expected layout. However, understanding this structure is still essential when working with your own data or building new projects.
/data
directory must exactly match those specified in the JSON (see example
below). Folder names must match criteria and component names, and file
names must match layer names.
dir_structure
Read configuration file
# Path to configuration file
pfa_path = config_dir / "newberry_superhot_config.json"

# Load JSON configuration safely (handles comments and malformed JSON)
pfa = safe_json_load(pfa_path)
Successfully loaded JSON file from: c:UserssmellocodegeoPFAexamplesNewberry2Dconfignewberry_superhot_config.json
Load data into the pfa dictionary
The gather_data function scans the structured directories, matches
files to layers defined in the configuration, and loads them into
memory.
We enable validation to ensure that: - all expected layers were found, - data was successfully read, - and datasets are not empty.
# Define the file types to be read (others will be skipped with a warning)
file_types = [".csv", ".shp"]

# Gather data according to the config structure
pfa = GeospatialDataReaders.gather_data(
    data_dir,
    pfa,
    file_types,
    validate=True
)
criteria: geologic
     component: heat
             reading layer: density_joint_inv
             reading layer: mt_resistivity_joint_inv
             reading layer: temperature_model_500m
             reading layer: earthquakes
     component: reservoir
             reading layer: lineaments
             reading layer: density_joint_inv
             reading layer: mt_resistivity_joint_inv
             reading layer: earthquakes
     component: insulation
             reading layer: density_joint_inv
             reading layer: mt_resistivity_joint_inv
             reading layer: earthquakes
             reading layer: temperature_model_500m

All layers contain valid 'data'.
If any layers are missing or invalid, a summary will be printed. To
enforce strict validation (raising an error instead of warnings), use:
validate=True, strict=True
This validation step helps catch issues such as missing files, naming mismatches, or failed reads early in the workflow.
3. Harmonizing Data
Now that all raw layers are loaded into the pfa dictionary, we’ll: -
Define a target coordinate reference system (CRS) - Constrain grid
resolution (nx and ny) - Import supporting data such as an area
outline or a well path to give context - Derive a shared spatial extent
for clipping and gridding - Preview the input data layers
Define the Target CRS and Import Contextual Data
# EPSG code for UTM Zone 10N (meters)
target_crs = 26910
# Define grid resolution (number of cells in x and y)
nx = 300; ny = 300

# Load the project boundary shapefile
outline_path = data_dir / "supporting_data" / "national_monument_boundary" / "NNVM_bounds.shp"
outline = gpd.read_file(outline_path).to_crs(target_crs)

print(f"Loaded boundary: {outline_path.name}")
Loaded boundary: NNVM_bounds.shp
Unify CRS and Define Extent
CRS is defined manually using the variable target_crs defined above.
Extent is defined using the defined extent_layer above, where the
project extent is set to that of the specified extent_layer.
# Reproject all layers to the target CRS
pfa = Cleaners.set_crs(pfa, target_crs=target_crs)

# Choose one representative layer to define the spatial extent
extent_layer = (
    pfa["criteria"]["geologic"]["components"]["heat"]["layers"]["mt_resistivity_joint_inv"]["data"]
)

# Get extent list. In 2D that is [xmin, ymin, xmax, ymax]
extent = Cleaners.get_extent(extent_layer, dim=2)  # Ensure we grab the 2d extent from 3d data

print(extent)
[624790.891073, 4825350.71118, 653145.891073, 4855310.71118]
4. Convert 3D Layers to 2D
Processing.convert_3d_to_2d() to collapse each 3D
layer along the Z-dimension into a 2D GeoDataFrame. One could
use Processing.convert_3d_to_2d() manually on each applicable data
layer, but we use a for loop in this example as most data layers
require flattening.Instead of taking a slice at a given depth, this function sums over Z and each X,Y location, providing insight into thickness of features. If you’d prefer to use a slice at a given depth, use that 2D slice as your input data layer rather than inputting the 3D model.
"is_3d": "yes"
in the configuration file"needs_flattening": "no")To save time, each unique layer is flattened only once and then reused for any other component that references it. This is especially useful for large shared datasets.
# Define the active criterion (geologic only in this example)
criteria = "geologic"

# Cache to store flattened layers and reuse them
flattened_layers = {}

for component, comp_data in pfa["criteria"][criteria]["components"].items():
    for layer, layer_config in comp_data["layers"].items():
        is_3d = layer_config.get("is_3d", None)
        needs_flattening = layer_config.get("needs_flattening", "yes")

        # Skip layers not flagged as 3D or marked "no" for flattening
        if not is_3d or str(needs_flattening).lower() == "no":
            continue

        # Use the layer name as the unique cache key
        key = layer

        if key in flattened_layers:
            print(f"Reusing flattened layer: {layer} for component: {component}")
            # Copy cached flattened layer into current component/layer
            pfa["criteria"][criteria]["components"][component]["layers"][layer] = (
                flattened_layers[key].copy()
            )
            continue

        print(f"Converting 3D layer: {layer} → 2D")

        # Perform flattening and store in PFA
        pfa = Processing.convert_3d_to_2d(pfa, criteria, component=component, layer=layer)

        # Cache the flattened result for reuse
        flattened_layers[key] = (
            pfa["criteria"][criteria]["components"][component]["layers"][layer].copy()
        )

print("3D → 2D flattening complete.")
Converting 3D layer: density_joint_inv → 2D
Converting 3D layer: mt_resistivity_joint_inv → 2D
Converting 3D layer: temperature_model_500m → 2D
Reusing flattened layer: density_joint_inv for component: reservoir
Reusing flattened layer: mt_resistivity_joint_inv for component: reservoir
Reusing flattened layer: density_joint_inv for component: insulation
Reusing flattened layer: mt_resistivity_joint_inv for component: insulation
Reusing flattened layer: temperature_model_500m for component: insulation
3D → 2D flattening complete.
Visualize Cleaned Raw Data Layers
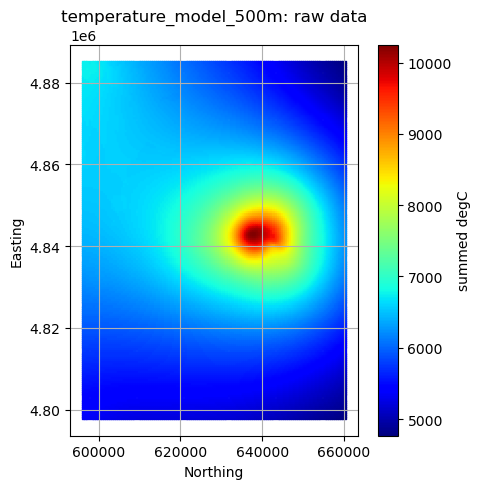
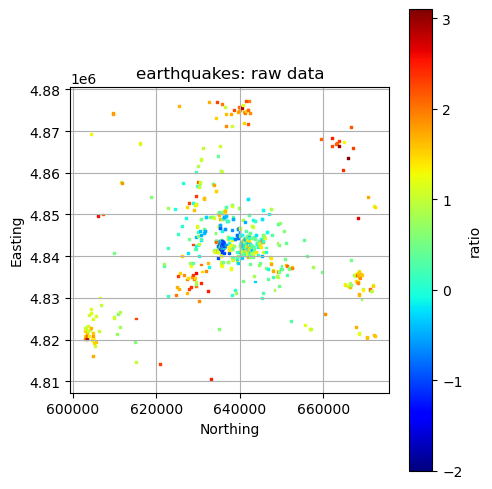
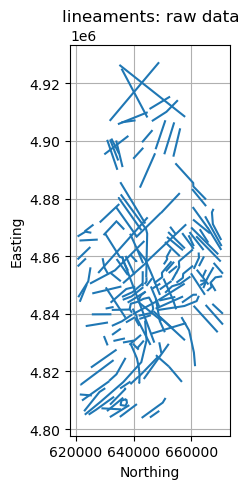
geoPFA has built-in plotting tools to help visualize data. Some
examples are shown below using
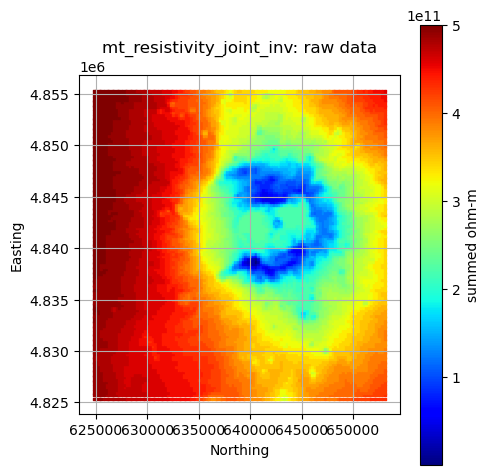
GeospatialDataPlotters.quick_plot_layer. #### Plot a Single Layer
component = "heat"
layer = "mt_resistivity_joint_inv"

gdf = pfa["criteria"][criteria]["components"][component]["layers"][layer]["data"]  # the gdf data
col = pfa["criteria"][criteria]["components"][component]["layers"][layer]["data_col"]  # the gdf column of interest
units = pfa["criteria"][criteria]["components"][component]["layers"][layer]["units"]  # data units as specified by the config file
title = f"{layer}: raw data"

GeospatialDataPlotters.geo_plot(gdf, col, units, title, markersize=2, figsize=(5, 5))
Plot All Layers (Optional)
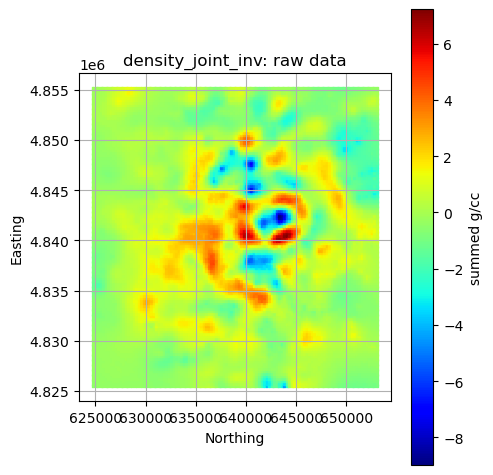
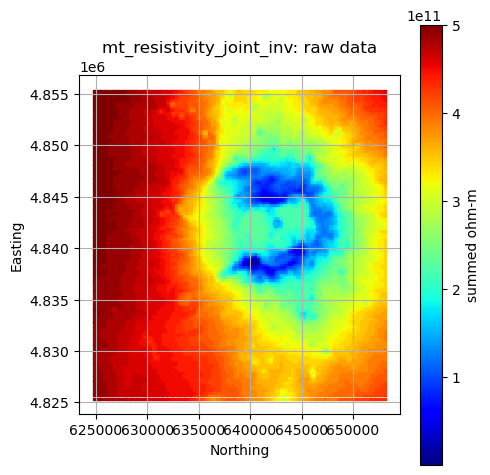
Loop through the full hierarchy and visualize every dataset. This is useful for verifying that CRS, units, and extents align, but can take time for large inputs.
for criteria, crit_data in pfa["criteria"].items():
    print(criteria)
    plotted_layers = []
    for component, comp_data in crit_data["components"].items():
        print(f"\t{component}")
        for layer, layer_data in comp_data["layers"].items():
            if layer in plotted_layers:
                print(f"\t\t{layer} plotted already")
                continue

            gdf = layer_data["data"]
            col = layer_data.get("data_col", None)
            if layer == "faults_newberry":
                col = "None"  # faults are geometries only

            units = layer_data["units"]
            title = f"{layer}: raw data"

            GeospatialDataPlotters.geo_plot(gdf, col, units, title, markersize=2, figsize=(5, 5))
            plotted_layers.append(layer)
geologic
    heat
reservoir
        density_joint_inv plotted already
        mt_resistivity_joint_inv plotted already
        earthquakes plotted already
insulation
        density_joint_inv plotted already
        mt_resistivity_joint_inv plotted already
        earthquakes plotted already
        temperature_model_500m plotted already
5. Data Processing and Preparation
This step transforms raw geospatial inputs into standardized layers on a shared 2D grid for comparison and combination.
(nx, ny) gridHow It Works
All 2D geoPFA processing functions follow the same pattern:
Take the raw input stored in
pfa["criteria"][criteria]["components"][component]["layers"][layer]["data"]Process it (e.g., interpolation, point density, distance-to-feature) onto the common 2D grid
Write the result to
pfa["criteria"][criteria]["components"][component]["layers"][layer]["model"]
Filter Outliers
Some datasets contain spurious extreme values. Use Cleaners.filter_geodataframe() to remove these outliers based on a quantile threshold.
# Filter the upper 10% of values in selected datasets
target_layers = []

for layer in target_layers:
    for component in ["heat", "reservoir"]:
        gdf = pfa["criteria"][criteria]["components"]["heat"]["layers"][layer]["data"]
        col = pfa["criteria"][criteria]["components"]["heat"]["layers"][layer]["data_col"]

        filtered = Cleaners.filter_geodataframe(gdf, col, quantile=0.9)
        pfa["criteria"][criteria]["components"][component]["layers"][layer]["data"] = filtered

print("Outlier filtering complete.")
Outlier filtering complete.
Extrapolation
geoPFA can perform extrapolation over each layer to ensure every
layer fills the complete extent. geoPFA uses a sparse Gaussian
process regression (GPR) model to backfill missing data.
Extrapolation would naturally sit at this point in the processing
workflow as it is a mechansim for placing data layers on a consistent
grid, but we do not include an example here. geoPFA's extrapolation
feature is very powerful, but can be computationally expensive–working
best with a careful understanding. For more information on this process
and to see an example with data from the Newberry site, please refer to
the 1.5-extrapolation_example.ipynb notebook.
Interpolation
For most datasets, data can be processed and prepared for layer
combination and favorability estimation by simply interpolating data to
the target grid. Here we do that only once for each input layer that has
"processing_method": "interpolate" specified in the configuration
file.
method = 'linear'

interpolated_layers = {}

for criteria, crit_data in pfa["criteria"].items():
    print(criteria)
    for component, comp_data in crit_data["components"].items():
        print(f"\t{component}")
        for layer, layer_config in comp_data["layers"].items():
            if layer_config.get("processing_method") == "interpolate":
                if layer in interpolated_layers:
                    print(f"\t\tReusing cached interpolation for {layer}")
                    pfa["criteria"][criteria]["components"][component]["layers"][layer]['model'] = (
                        interpolated_layers[layer]['model'].copy()
                    )
                    pfa["criteria"][criteria]["components"][component]["layers"][layer]['model_data_col'] = (
                        interpolated_layers[layer]['model_data_col']
                    )
                    pfa["criteria"][criteria]["components"][component]["layers"][layer]['model_units'] = (
                        interpolated_layers[layer]['model_units']
                    )
                else:
                    print(f"\t\tInterpolating layer: {layer}")
                    pfa = Processing.interpolate_points(
                        pfa,
                        criteria=criteria,
                        component=component,
                        layer=layer,
                        interp_method=method,
                        nx=nx,
                        ny=ny,
                        extent=extent,
                    )
                    interpolated_layers[layer] = (
                        pfa["criteria"][criteria]["components"][component]["layers"][layer].copy()
                    )
geologic
    heat
            Interpolating layer: density_joint_inv
            Interpolating layer: mt_resistivity_joint_inv
            Interpolating layer: temperature_model_500m
    reservoir
            Reusing cached interpolation for density_joint_inv
            Reusing cached interpolation for mt_resistivity_joint_inv
    insulation
            Reusing cached interpolation for density_joint_inv
            Reusing cached interpolation for mt_resistivity_joint_inv
            Reusing cached interpolation for temperature_model_500m
Point Density to be Used as a Favorability Proxy
For some layers, the spatial density of points (e.g., earthquake
occurrences) is an indicator of permeability or fracturing. geoPFA
has two options to do this in 2D, including: -
Processing.point_density: Computes 2D density projected onto
user-defined grids (ofter coarser than the project grid), ,and then
project those onto the project grid to allow PFA computations that rely
on harmonized grids. - Processing.weighted_distance_from_points:
Compute a weighted influence field from points over the 2D project grid,
using distance to control “influence,” optionallly weighted by an
attribute of the user’s choice (e.g., earthquake magnitude).
In this example, we use Processing.weighted_distance_from_points
because it produces smoother results and alllows us to incorporate
earthquake magnitude. > Tuning Tip: Larger alpha values spread
each equarthquake’s influence farther; smaller values make it more
localized. In other words, a larger value for alpha might be
preferably when wworking with relatively sparse earthquakes.
criteria = 'geologic'
layer = 'earthquakes'
# Filter extreme densities
for comp in ["heat", "reservoir", "insulation"]:
    pfa = Processing.weighted_distance_from_points(pfa, criteria=criteria, component=comp,
                               layer=layer, extent=extent, nx=nx, ny=ny, alpha=1000)
    gdf = pfa["criteria"][criteria]["components"][comp]["layers"][layer]["model"].copy()
    col = pfa["criteria"][criteria]["components"][comp]["layers"][layer]["model_data_col"]
    filtered = Cleaners.filter_geodataframe(gdf, col, quantile=0.9)
    pfa["criteria"][criteria]["components"][comp]["layers"][layer]["model"] = filtered
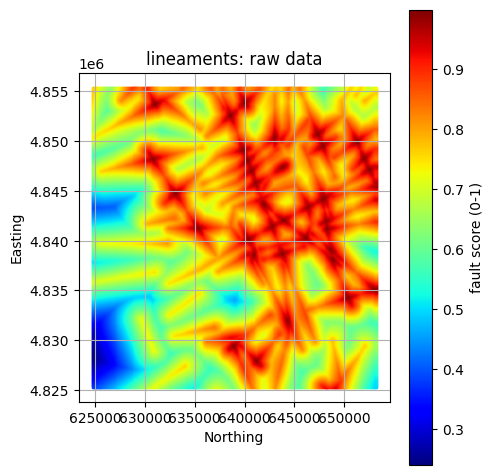
Process Faults
process_faults() function to calculate a
fault-based favorability score that increases with proximity to
faults and (optionally) their intersections.alpha_fault, alpha_intersection) to represent how
influence decreases with distance.weight_fault and weight_intersection.Tuning Tip: Larger
alphavalues spread the fault’s influence farther; smaller values make it more localized.
component = "reservoir"
layer = "lineaments"

# --- Fault processing for reservoir component ---
pfa = Processing.process_faults(
    pfa,
    criteria=criteria,
    component=component,
    layer=layer,
    extent=extent,
    nx=nx,
    ny=ny,
    alpha_fault=5500.0,        # decay distance for faults
    alpha_intersection=3500.0, # decay distance for intersections
    weight_fault=0.7,          # relative weighting of faults vs intersections
    weight_intersection=0.3,
    use_intersections=True,    # include intersection effects
)

#  Visualize the results
#  Note the plotted extent differs from the raw data when comparing

# Note we now grab the processed data from its "model" locations
gdf = pfa["criteria"][criteria]["components"][component]["layers"][layer]["model"]
col = pfa["criteria"][criteria]["components"][component]["layers"][layer]["model_data_col"]
units = pfa["criteria"][criteria]["components"][component]["layers"][layer]["model_units"]
title = f"{layer}: raw data"

GeospatialDataPlotters.geo_plot(gdf, col, units, title, markersize=2, figsize=(5, 5))
Plot All Processed Layers
for criteria, crit_data in pfa["criteria"].items():
    print(criteria)
    plotted_layers = []

    for component, comp_data in crit_data["components"].items():
        print(f"\t{component}")

        for layer, layer_data in comp_data["layers"].items():
            if layer in plotted_layers:
                continue

            # Skip if no processed model exists
            if "model" not in layer_data or layer_data["model"] is None:
                print(f"\t\t!! Skipping {layer}: no processed 'model' found.")
                continue

            gdf = layer_data["model"]
            col = layer_data.get("model_data_col")
            units = layer_data.get("model_units", "None")
            title = f"{layer}: processed model"

            # Plot in 3D
            GeospatialDataPlotters.geo_plot(
                gdf, col, units, title, area_outline=outline, extent=extent, markersize=0.75, figsize=(5, 5)
            )

            plotted_layers.append(layer)

print("\nFinished plotting all available processed layers.")
geologic
    heat
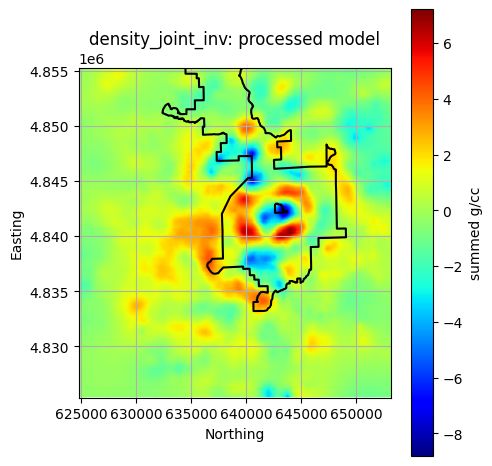
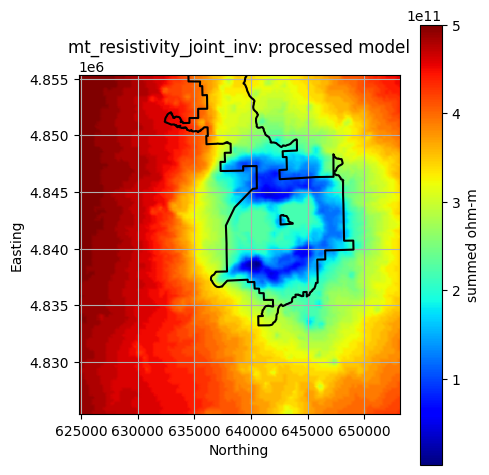
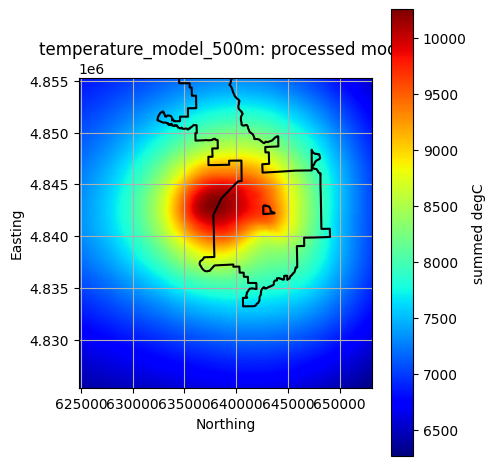
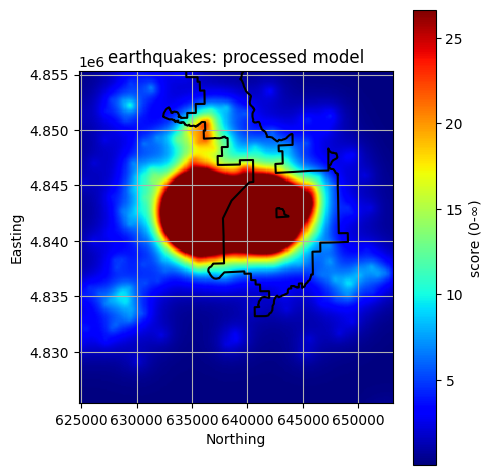
reservoir
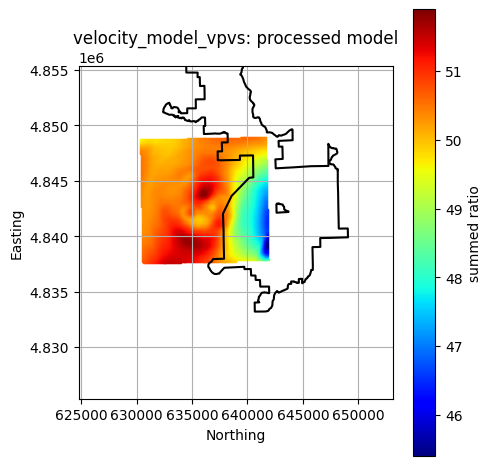
    insulation

Finished plotting all available processed layers.
Save Processed Layers
It’s good practice to save processed data to disk before proceeding so processing only has to be completed once. This allows the user to make minor tweaks to the PFA, such as adjusting weights, without reprocessing all data layers.
geoPFA has a built in function for this.
# Save processed CSV files to the same data directory
GeospatialDataWriters.save_processed_layers(pfa, data_dir)
Saving processed layers...

geologic
    heat
            Saved: c:UserssmellocodegeoPFAexamplesNewberry2Ddatageologicheatdensity_joint_inv_processed.csv
            Saved: c:UserssmellocodegeoPFAexamplesNewberry2Ddatageologicheatmt_resistivity_joint_inv_processed.csv
            Saved: c:UserssmellocodegeoPFAexamplesNewberry2Ddatageologicheattemperature_model_500m_processed.csv
            Saved: c:UserssmellocodegeoPFAexamplesNewberry2Ddatageologicheatearthquakes_processed.csv
    reservoir
            Saved: c:UserssmellocodegeoPFAexamplesNewberry2Ddatageologicreservoirdensity_joint_inv_processed.csv
            Saved: c:UserssmellocodegeoPFAexamplesNewberry2Ddatageologicreservoirmt_resistivity_joint_inv_processed.csv
            Saved: c:UserssmellocodegeoPFAexamplesNewberry2Ddatageologicreservoirearthquakes_processed.csv
            Saved: c:UserssmellocodegeoPFAexamplesNewberry2Ddatageologicreservoirlineaments_processed.csv
    insulation
            Saved: c:UserssmellocodegeoPFAexamplesNewberry2Ddatageologicinsulationdensity_joint_inv_processed.csv
            Saved: c:UserssmellocodegeoPFAexamplesNewberry2Ddatageologicinsulationmt_resistivity_joint_inv_processed.csv
            Saved: c:UserssmellocodegeoPFAexamplesNewberry2Ddatageologicinsulationearthquakes_processed.csv
            Saved: c:UserssmellocodegeoPFAexamplesNewberry2Ddatageologicinsulationtemperature_model_500m_processed.csv

Finished saving processed layers.
Save a “Clean” PFA Config (no GeoDataFrames)
Similarly, saving a “clean” processed PFA config allows the user to avoid repeating the processing step when making minor adjustments to the PFA. This processed config serves as the config file for the next step.
# Save clean processed PFA config file
GeospatialDataWriters.save_clean_pfa_config(
    pfa,
    config_dir / "newberry_superhot_processed_config.json"
)
Saving clean PFA configuration...

Processed PFA configuration saved to: c:UserssmellocodegeoPFAexamplesNewberry2Dconfignewberry_superhot_processed_config.json
Next Steps: Layer Combination and Favorability Modeling
This concludes Notebook 1 – Data Processing with ``geoPFA``.
You’re now ready to combine these layers into component and criteria favorability models.